Saturday, March 30, 2013

Progress

I had a good day today, the weather was warm and the sun was out. It was a good day to work on the RV.
Today was the day I had set aside to fix the exhaust and I got a bit of a late start. I had to run to the storage facility to pay for three more months. While I was there I pulled out my Sawsall, an important tool in the removal of car parts.
I left the storage place and headed north. On the way up I stopped by an auto parts store to pick up a few things like pipe adapters, a tailpipe and other little bits and pieces. And then off I went to the maker space.
When I arrived I unpacked my car and laid out my tools and parts. I backed up the RV to a dryer spot and crawled under to get a good look at what I'm about to do.
Aside from the muffler being all exploded and stuff the rest of the exhaust didn't look bad and the pipes were quite solid. This would make for an easy welding job, you can't weld to thin rusty metal.


The I noticed a bit of a gas smell wafting in the air, so I investigated. Out of the corner of my eye I saw a drip coming from the vicinity of the fuel pump. I crawled under the front of the van and saw the culprit, the pressure side fitting was dripping. Ok, easy fix, I grabbed my wrenches and cinched down on them. No movement. The fitting was as tight as I could get it and now I will have to replace it.
No big, but this means no welding under the vehicle. So I thought of a work around and measured out the parts and fittings that I would need and I welded up everything I could in the shop. I took the mass of welded exhaust parts and slid under the rig. I had to run back to the parts store because I needed a couple of clamps to get everything tight. After that it was as simple as positioning the parts and tightening the u-bolts.
I had purchased a section of tailpipe because the pipe end was rusty and didn't look good. I cut back the pipe to good metal, which was not far and pushed the new tail in position.


My next task was to get the taillights done. I had painted them over the last couple of days and now they were ready to be assembled an attached. The wiring was strait forward and I attached them with coated exterior screws. I bought the LED driving lights and mounted them to the bottom of the housings.

They are nice little units and they put out a lot of light. Maybe not good enough for driving lights but more than adequate for back up lights.


Here are the left and right sides. I sealed around the top and sides with silicone caulking and left the bottom open so water could escape. The lights work great and are nice and bright.
All I have to do now is mount the plate light and attach my plates.

Aside from the interior work here is what I have to do.
-Fix the gas leak (easy)
-Attach plate and light (also easy)
-Finish installing the front marker lights (I keep putting it off for some reason)
-Fix the hood latch (very easy, I should have done that today)

The list is getting smaller and when I'm done it goes off for inspection.

As for the interior, I have stripped all the cushion casings off and will bring them to a laundry-mat to clean them. They are in real good shape and the foam is perfect. Once I get the cushions recovered I will clean up the interior of the RV.
The bathroom will be the last thing I do. There are a few items that need attention like the black water tank. Apparently the previous owner had a heck of a time backing up. I think he used the braille method. While I was under the vehicle I looked at the black water system and noticed that the dump pipe had been driven up into the floor. Nothing is damaged but it has to be pulled back down and re-secured. I also noticed that I have a gray water tank. The tanks look like they are in good shape and I should have no problem.

Friday, March 29, 2013

Paint Light Assemblies, Check.

I finished the light assemblies, with the exception of the back up lights. I will shop for them on Saturday. The big project for Saturday is repairing the exhaust.
I bought the muffler a week ago and I picked up ten feet of 2-1.4" pipe today. That should be enough to get me going, I may have to buy some bends but I will not know until I disassemble it.
The y-pipe looks good but the tail pipe may need to be replaced.

The Cold Weather is Slowing Me Down.

I had intentions of painting my lights last night and I got as far as cleaning and priming them, but it took a long time to dry so instead of rushing the paint and risking all kinds of mean nasty problems I opted to let it dry completely overnight and paint them tonight.
I will also remove the temporary lights and attach the new pigtails for the truck lights. All I'll need now is back up lights. I looked at some LED driving lights intended for the front of the car and they look like they will be very useful as back up lights. I'll attach them to the bottom of the tail lights.


I'm buying a back up camera and these should put out enough light to assist it for night time shenanigans.
Here is my idea.


The backup light will hang below and to the right. The other side will mirror it.


Wednesday, March 27, 2013

Local Transport

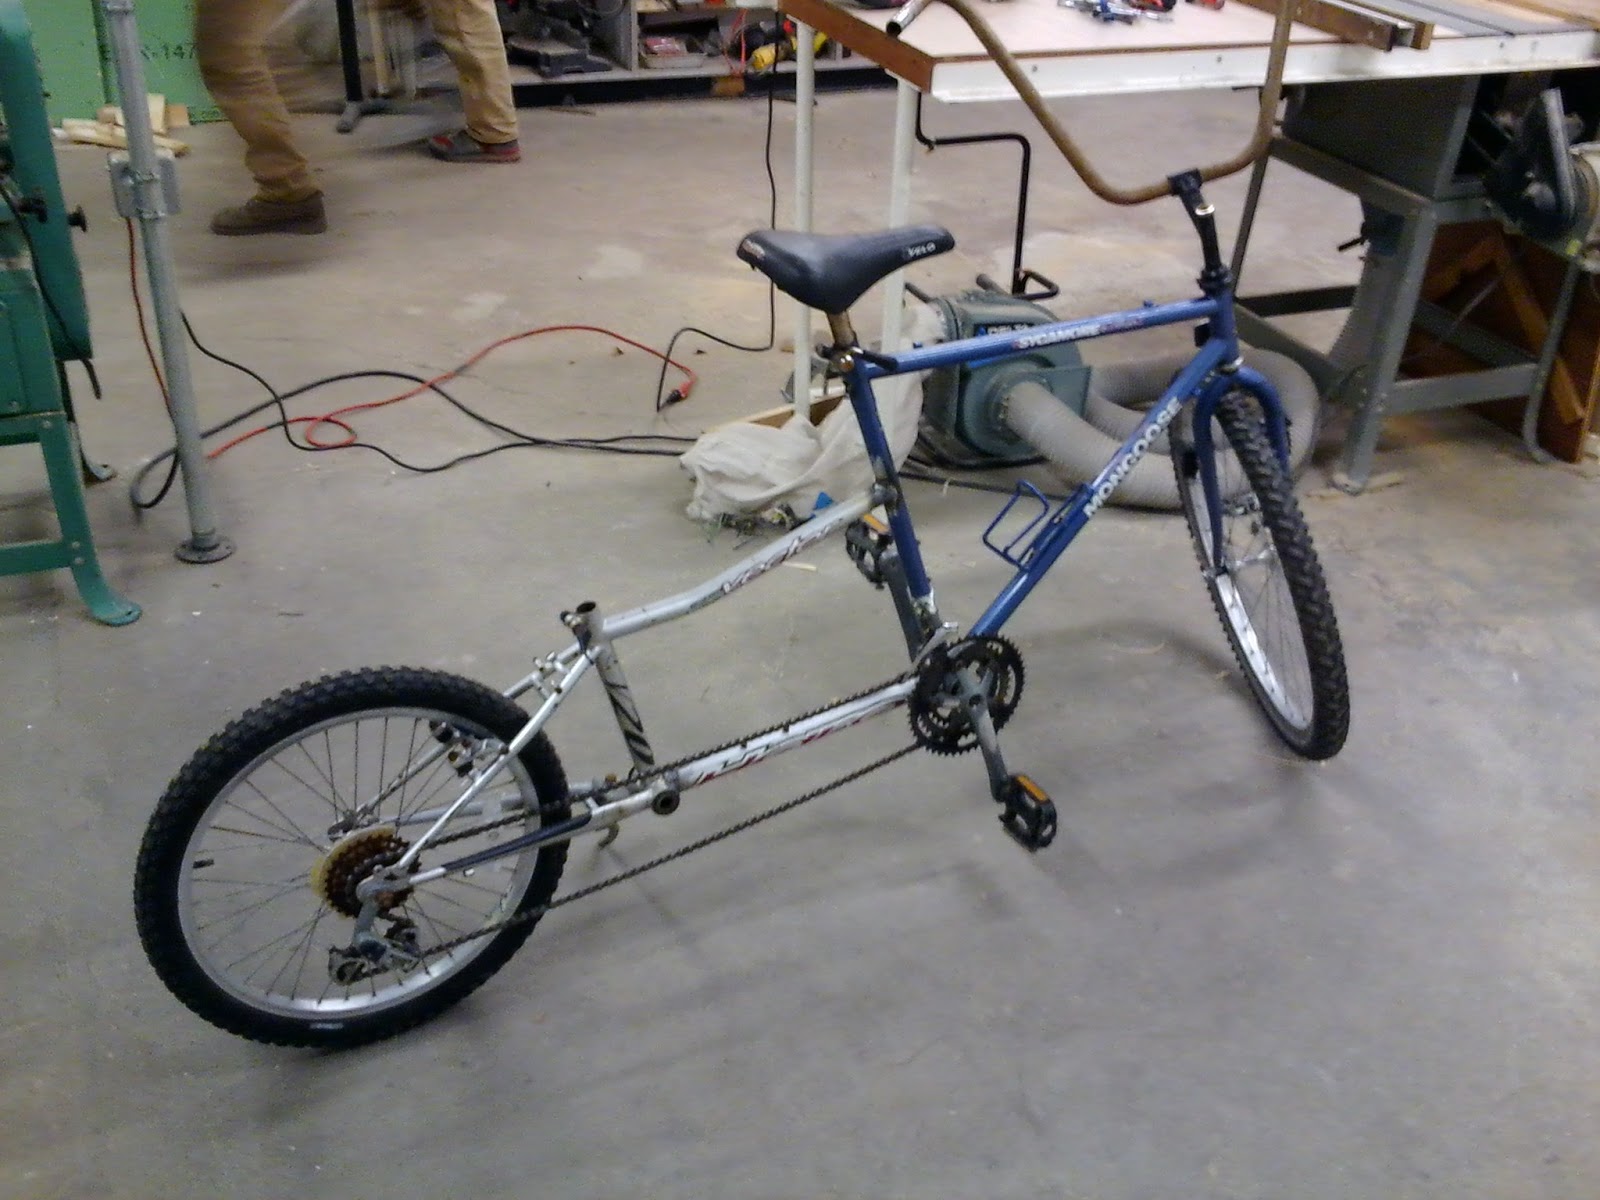
I've been building a cargo bike at the Port City Makers Space for the last couple of months. Although the RV has taken a lot of my time I will finish this bike and add a custom bike rack to the back of the RV to accommodate it.


This is an older picture, I have the cargo bed nearly finished and one brake line functioning. All I need is a derailer control and a quick paint job. It's going to be a great grocery getter,


Getting Closer. . .

I just insured the RV, one more step in the right direction. I had to insure it as a pleasure van. The reason they gave oddly enough was that it didn't weigh enough.
Go figure?
I'll have my trusty AAA card with me just in case, along with the purchased roadside assistance through my insurer.
I'm getting the itch to travel, or maybe it's the new soap I'm using.

Tuesday, March 26, 2013

Tail Lights

I drove up to the maker space after work today and made the tail lights. I had this burst of energy and creativity so I thought this was the best way to vent it. I bought tractor trailer tail lights because they are plentiful and cheap. They are also LED so they will be nice and bright. And they are DOT approved.
I bought sheet metal at the local home store and got soaked, they really mark that stuff up. Anyway here it is, one of them, I left the other in the car.


I installed one light to see how it fit and it is good. The sheet metal is 16 gauge steel. This is the drivers side assembly. The top and right side are bent at roughly a half inch radius and it over hangs the box by a quarter of an inch.


The tabs are for securing the assembly to the RV. The lights themselves are water tight and use a plug, nice and simple and easily replaceable. I left room on one side so if I wanted to add a trailer light receptacle I will have room. I'll paint them tomorrow and attach them on Friday.

One more thing off the list. This will leave me the weekend to fix the exhaust. 

Monday, March 25, 2013

Bathroom Remodel

This past weekend I made great progress with the Nomad. I removed the fresh water tank and water heater and, with the exception of the shower and toilet, completely gutted the interior. There is surprisingly little in support and structure in the walls. What I thought was soft wood ended up being just insulation.


 Here it is in all it's glory. It's pretty tight quarters for a bathroom but as far as RV's go it's massive. Lots of RV's today of this size use the all in one bathroom or wet bathroom and they are so small that you have to back in. Not my RV, it sports a small tub /shower a toilet and a vanity sink. All in a fairly spacious room.
Now to tear it out.


 First goes the vanity sink and to my surprise some of the original carpet is still there. I have found several swatches of carpet in a few places around the old homestead and some of it is in remarkably good shape.


The whole RV must have been done in this vintage  green shag carpet and later had been cut out and replaced by linoleum. I never though carpet in the bathroom was a good idea and I will be installing either that click floor or the strips of rubbery linoleum, both of which are floating floors.
The tub is in good shape and that side of the RV is solid so I'm going to leave it in place. The real work is the vanity side where I have to gut it to the studs. That corner of the RV has come apart and needs repair before it moves anywhere.
I have no picture of before the repair was made, I thought I did. Anyway. . .


 The water heater and the fresh water tank have to be removed. The water take was not secured and it just sat on the floor under the water heater. It is very hard to get at so I decide to do more demolition to give me better access.


 You can just see the closet shelf in the top of the picture. After removing that everything was very easy to reach. The water lines connected to the water heater were supporting it so I left it alone while I worked on the water tank. I have to disconnect the fill tube, drain tube and feed tube. Then it was just a matter of wrestling with it to get it out the access hole on the side of the camper. Unfortunately I broke the filler inlet and will have to replace the tank. I'm not too broken up about it because I think I would like a tank that's bigger and made of more modern materials. After all, I will be in the desert most of the time.


 I stripped out most of the cabinetry and to my surprise there was not very much holding the walls together, even if the wood was not rotten. But the corner is completely gone as is most of the 1/8" plywood and studs.
You can see sunlight through the corner and I had taped it up with gorilla tape so I wouldn't get any critters as overnight guests.
Next I needed to remove the water heater and this involved undoing three lines, two water and one gas. I undid the gas line first and after getting a couple of turns on it I noticed a rotten egg smell. Well there must be a little gas still in the system so I just kept going. I loosened up the nut a little more and now I could hear the gas escaping. Well, I think I'll just tighten that line back up and check the tank valve. I know I shut it but maybe some kids were playing around so I crawled under and grabbed a hold of it and it was shut. Ok, the valve is probably bad. So I ran to the home store and bought a plug fitting. My plan was to undo the line and secure it with the plug. I undid the line and as soon as it came free there was a rush of gas for a split second and then nothing. That made me feel better, it was just residual pressure in the line. I put the plug in place and continued to remove both water lines.
I unscrewed the eight hex head screws holding the front to the wall and cut the gasket material with a utility knife. And it pulled out without a problem.


 I took some notes and ran off to the home store again to buy building supplies. The total came to thirty two dollars and change. I bought six two by threes, a box of three inch exterior screws, a box of two and a quarter exterior screws and some metal roofing screws.
It was getting late in the day so I framed up the wall and attached the siding with the roofing screws. I had to do some creative body work because the previous owner looked like they had trouble backing up, or going forward for that matter. I banged out the outer corner molding and buttoned it all up.


The corner is now as solid if not more than when it was new. I taped up the water heater hole with some plastic and replaced the water tank cover. Done.

I cleaned out all the debris from the bathroom and filled four large industrial garbage bags. My car can only hold two, so a couple of trips will be needed to get it all gone.

I will not be replacing the water heater, rather I will be using a couple of on demand heaters powered by the generator.

Now all I have to do is figure out what I'm going to install.